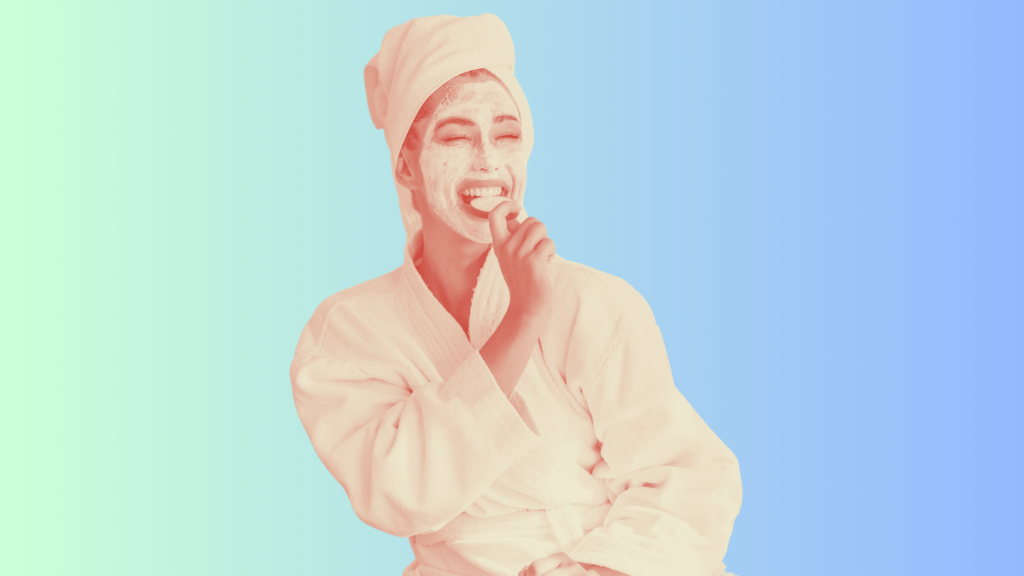
How to Give Yourself a Luxurious At-Home Facial
Every product on Beauty Empties is one that actually gets used up and bought again. Some of the links in this post are affiliate, which means we may earn a small commission if you make a purchase, at no extra cost to you. Thanks for being here!
A facial in most cities now runs $150 to $300, and that’s before the LED-panel and “oxygen treatment” upsells the front desk pitches you on the way in. Most of that 60-minute treatment is product application you could be doing yourself, on a much faster clock than skin actually responds to. The part worth paying for (the facialist’s actual hands on your face) is closer to thirty minutes than the full sixty.
The at-home version skips the hands part, which is the real trade-off, but it adds back everything the spa schedule has to cut: layered products that get enough time to actually do anything, a hot towel without a turnover timer, and lights low enough to make the whole thing feel like a real night (or day) off rather than another item on the to-do list.
1. Start with the room
The setup matters more than people think. A hot shower softens the skin’s surface, dim lighting and twenty minutes of quiet help you slow down, and the combination is what makes everything you put on next work the way it’s supposed to. Run a shower or a bath first, then set out a big towel within arm’s reach, a hot, wrung-out washcloth, a glass of water on the counter, and your phone somewhere it can’t interrupt.
Lighting matters as much as room temperature. Bright overhead lights make it hard to slow down, so swap them for a lamp or a candle before you start. Keep the room warm too, because a cold bathroom makes skin tighten the second you walk in, which is the opposite of what you want for the next forty-five minutes.
2. The double cleanse, and why the order matters
The first cleanser does the heaviest work. SPF, makeup, and the day’s pollution all come off in this pass, and water cleansers can’t really grip any of it without scrubbing, so this one has to be oil- or balm-based. The second cleanser goes on after the first is rinsed, applied to wet skin, and takes off whatever residue is left to get you down to actual skin.
Skip this step and the products you put on next never really reach skin. A film stays on the surface, and any serum applied over it just sits on the film instead of absorbing. It’s the single most common reason at-home routines stop working over time.
Spend two full minutes on each cleanser, working slow circles into the skin until your hands feel warm from the friction. Scrubbing won’t get you there any faster, and if you’re already using a BHA or retinoid most nights, it can leave skin more reactive than it needs to be.
Heimish All Clean Balm
This is the oil-based first cleanser the Korean skincare community has been finishing and rebuying in volume for nearly a decade, built around shea butter, jojoba oil, and sweet almond oil in a wide-mouthed jar that lets you scoop with a fingertip rather than fight a pump. The texture starts out as a solid balm, turns into a milky oil on contact with warm skin, and then emulsifies into a watery wash the moment the wet washcloth touches your face.
The honest caveat is the packaging and the climate sensitivity: the jar isn’t ideal for travel, and the texture goes harder in a cold bathroom (more on that in the BEEs note below). Save it for nights you’ve worn full SPF, full makeup, or both, since bare-skin mornings can get away with something simpler.
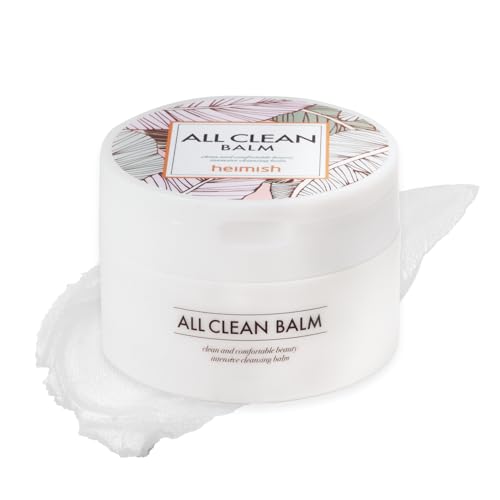
Heimish All Clean Balm
The #1 pick for the first cleanse. A solid balm that melts into a milky oil on contact with skin, then emulsifies into a watery wash on contact with the wet washcloth. Built around shea butter, jojoba, and sweet almond oil.
What Our BEEs Say
BEEs lean on this for full-makeup days and full-SPF days, which for most people is most days. Winter is when the texture frustrates BEEs the most, because the balm goes harder in a cold bathroom and takes longer to warm up between the fingers before it’ll melt on skin (the workaround BEEs settle on is scooping the amount they need first, holding it in the palm for ten seconds, then applying). At facial-night frequency, a four-ounce jar lasts most BEEs about six months.
CeraVe Hydrating Facial Cleanser
This is the non-foaming, fragrance-free cleanser dermatologists have been pointing patients to for over a decade, formulated with three ceramides, hyaluronic acid, and glycerin to take off residue without stripping moisture from the skin in the process. As the second step in a double cleanse, that’s exactly the role it’s getting asked to play.
One caveat worth knowing: on its own, this cleanser won’t take off a full face of makeup, which is exactly why it works best after an oil cleanse rather than alone. The 16-ounce bottle is the version most people land on, and a smaller travel size also exists if you’re testing it before committing.
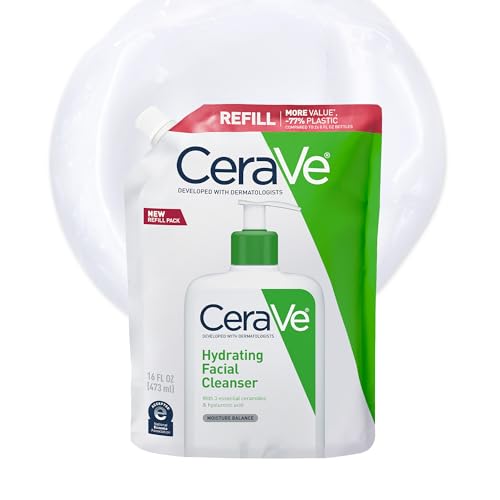
CeraVe Hydrating Facial Cleanser
The #1 pick for the second cleanse. A non-foaming, fragrance-free cleanser with ceramides, hyaluronic acid, and glycerin that takes off the residue from the oil cleanse without stripping anything else.
What Our BEEs Say
BEEs default to this as the second-cleanse partner because it doesn’t fight with anything you might put on top of it later. The most common gripe is the pump, which has a habit of giving up well before the bottle is actually empty, leaving BEEs to either decant into a different pump bottle or unscrew the cap to scoop the last bit out by hand. On its own this cleanser won’t take off a full face of foundation, which is exactly why it works best after the oil cleanse rather than on its own.
3. Steam your face the way a facialist would
Steam opens pores and softens whatever’s stuck inside them (oil, makeup residue, dead skin), which is half the reason extractions at the spa go so smoothly. The kitchen version is just as effective and costs nothing. Bring a pot of water to a boil, take it off the heat, and set it on a heatproof mat on the table. Then sit with your face about a foot above the surface, a towel tented over your head and the pot, and breathe slowly for five to seven minutes.
A few things to watch. The water has to be off the heat before your face goes anywhere near it, and twelve inches is the closest you should ever get. If your skin is reactive or rosacea-prone, skip the steam altogether; a hot wrung-out washcloth pressed over the face for the same five minutes gets you most of the way without the intensity.
(Hot showers don’t quite replace this step. The steam evaporates the second you step out, and your skin’s surface temperature drops fast right after. Directed steam from a pot under a towel holds the heat against your face for the whole five minutes instead.)
4. Pick one acid and stop there
Steam softens what’s sitting on the surface, and a chemical exfoliant takes it off. Salicylic acid (BHA) reaches deeper into the pore than glycolic, lactic, or mandelic (the AHAs), which is why it’s the usual pick for the exfoliation step. AHAs work fine too if BHAs don’t agree with your skin, but one acid is the rule either way; combining two or three sets you up for redness and irritation by morning.
Apply with a cotton pad in slow passes over the cheeks, forehead, chin, and the sides of the nose, staying clear of the area right under the eyes. Wait five to ten minutes before moving on. Skin will look slightly pink during that wait, which is normal and fades within an hour.
If you’re using retinoids (prescription or over-the-counter) on a regular schedule, skip them tonight. Stacking a BHA, a retinoid, and a mask in the same evening is how you end up with red, raw, peeling skin the next morning.
Paula’s Choice Skin Perfecting 2% BHA Liquid Exfoliant
This is the leave-on salicylic acid that has stayed at the top of dermatologist BHA recommendations for more than twenty years, formulated with 2% salicylic acid at a pH that lets the acid actually do its job (a detail a lot of cheaper BHAs get wrong) and rounded out with green tea extract for some anti-inflammatory backup. The four-ounce bottle is the standard size, and the one-ounce travel version is what most people pick up the first time around to see if it agrees with them.
The honest caveats are the texture and the smell. The formula can leave a slight tackiness if you don’t wait the full five to ten minutes before layering anything on top, and the faint herbal scent takes some getting used to. The four-ounce bottle now sits around $35, which is no longer the budget pick in the BHA category but still well under the cost of any single facial.
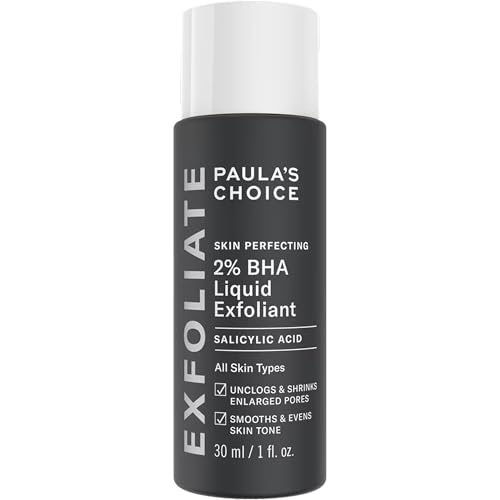
Paula’s Choice Skin Perfecting 2% BHA Liquid Exfoliant
The #1 pick for the acid step. A leave-on liquid with 2% salicylic acid at a pH that lets the acid work, plus green tea extract for anti-inflammatory backup.
What Our BEEs Say
BEEs keep buying this BHA even when newer dupes hit the market, mostly because none of them perform exactly the same way at the same pH. The faint herbal smell takes some getting used to, and the formula can leave a slight tackiness if you don’t wait the full five to ten minutes before layering anything on top of it. BEEs also flag the price now that the four-ounce bottle sits around $35, with the smaller travel size as the cheaper way in for anyone testing the formula for the first time.
5. Apply the mask thicker than you think
Two kinds of masks earn a spot here, depending on what you want by the end. A gel-based hydrating mask is the move for plump, dewy skin. A clay mask is the better pick for actively oily skin or congestion you’re trying to draw out. Sheet masks work too, but they slide on warm skin during a longer routine, where the gel and clay options stay put on their own.
Apply a thicker layer than the packaging suggests, especially around the cheeks and forehead. Leave it on for ten to fifteen minutes while doing nothing else. The waiting is what makes the step work, so put the phone down, skip the book, and let the mask do its job in the dim room.
Wipe off, or rinse depending on the mask, with the warm wet washcloth you set out at the start.
Summer Fridays Jet Lag Mask
This is the gel-cream hydrating mask that launched Summer Fridays as a brand and then stayed at the top of beauty editor lists for years on its own merits. The formula combines hyaluronic acid, niacinamide, glycerin, and antioxidants in a texture thick enough to sit on the skin without slipping during a longer routine, and it doubles as a leave-on overnight treatment when you’re not doing a full facial, which is part of how the tube actually gets used up rather than abandoned in a drawer after two uses.
The honest caveats are price and scent. The per-ounce cost stays in the splurge category even after Summer Fridays sized the tube up to 2.25 oz, especially given this is the step where you’re applying a thicker layer than usual, and the faintly green smell from the antioxidants splits opinion (a small handful of reviewers with very sensitive skin also flag mild stinging on the first application).
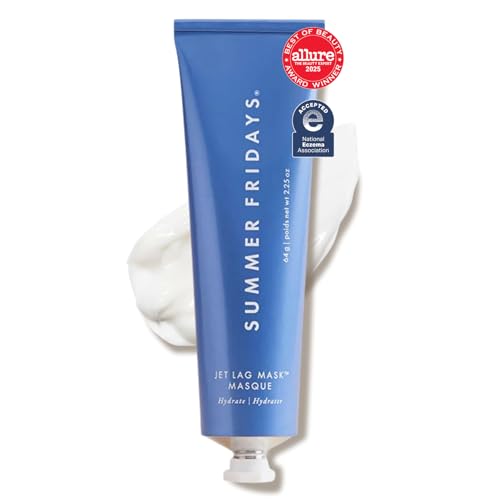
Summer Fridays Jet Lag Mask
The #1 pick for the hydrating mask step. A gel-cream mask with hyaluronic acid, niacinamide, glycerin, and antioxidants that doubles as a leave-on overnight treatment when you’re not in facial mode. The 2.25-ounce tube is the current full size; a mini exists for travel.
What Our BEEs Say
BEEs put this in the same category as a good silk pillowcase, the kind that’s easy to skip in theory and hard to give up once you’ve tried it. The price-per-ounce is the main thing BEEs raise even after Summer Fridays sized the tube up to 2.25 oz, and the ones finishing a tube every two months tend to also keep a cheaper drugstore gel mask in rotation for the in-between weeks. The faintly green scent splits opinion across the community, though most BEEs land on the side of “it grows on you.”
6. Massage with a stone or roller for five minutes
A facialist’s hands are the hardest part of a $250 spa visit to recreate at home. They’re also the easiest part to half-recreate, with a gua sha stone or a roller, used on skin that’s still damp from the mask wipe so the tool glides instead of dragging.
The motion is upward and outward, in three passes: chin along the jawline to the ear, corner of the nose along the cheekbone to the temple, and from between the eyebrows up to the hairline. Use light pressure on the eye area, firmer pressure on the cheeks and jawline, and stop after five minutes total. Longer doesn’t add much, and shorter doesn’t quite get there.
Skin should feel warmer and look slightly more contoured right after. The lymphatic effect (less puffiness, especially under the eyes) tends to show up the next morning, in the mirror at the office.
Wildling Empress Stone
This is the gua sha tool that helped move the practice from niche wellness corners into the mainstream facial routine, hand-carved with three different edges (the long curve for the jawline, the comb edge for the neck and brow, and the small notch for the under-eye area) so it fits the face in a way the standard heart-shaped stones don’t. The brand’s printed guide and video tutorials are worth the fifteen minutes it takes to watch one before the first use.
The honest caveat is the price. At $89, this is a steep buy for a stone tool when a $20 rose quartz gua sha covers most of the basic motions, and the upgrade is really about the edge shapes fitting the face more precisely rather than the material itself doing anything different. The first few sessions also feel awkward, and the technique takes a couple of facial nights to settle into before the motions start to feel natural.
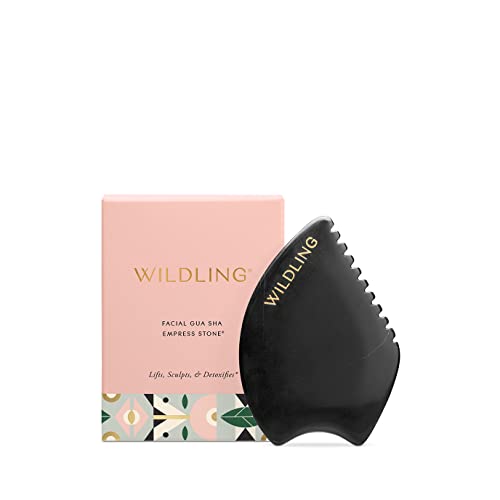
Wildling Empress Stone
The #1 pick for the massage step. A hand-carved gua sha tool with three edges (the long curve for the jawline, the comb edge for the neck and brow, and the small notch for the under-eye area). Comes with a printed guide and access to the brand’s video tutorials.
What Our BEEs Say
BEEs who own one tend to use it twice a week rather than nightly, and they split on whether the price tag is worth it: $89 is steep when a $20 rose quartz stone covers most of the basic motions, and BEEs who started with the cheaper version say the upgrade is mostly about the carved edges fitting the face more precisely rather than the material doing anything different. The learning curve is the second piece worth knowing about, since the first few sessions feel awkward and watching one video tutorial before the first use saves a week of guessing your way through it.
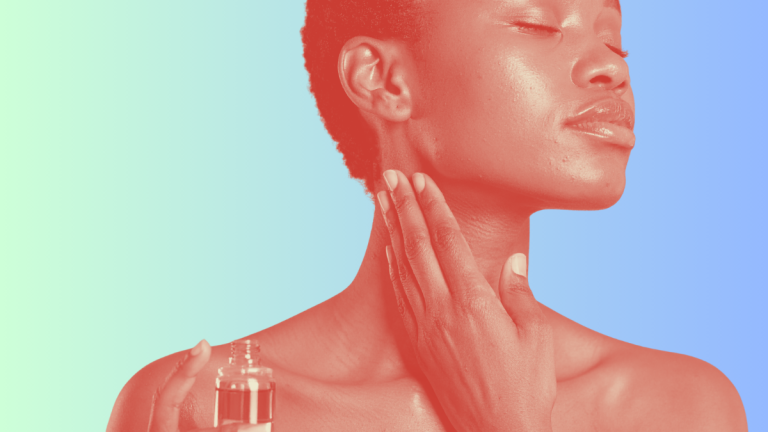
7. Press a treatment serum in for two full minutes
A real treatment serum pressed into damp skin with the fingertips for two full minutes is where the at-home version closes the gap on the spa. Pressing the product into skin is what makes the difference. Patting it onto the surface won’t get you there.
Pour three to five drops into your palms and rub your hands together to warm the formula. Press the serum into the face section by section, starting with the cheeks and moving to the forehead and jawline, then finishing around the eyes and on the lips. Take the full two minutes to work through every section without rushing.
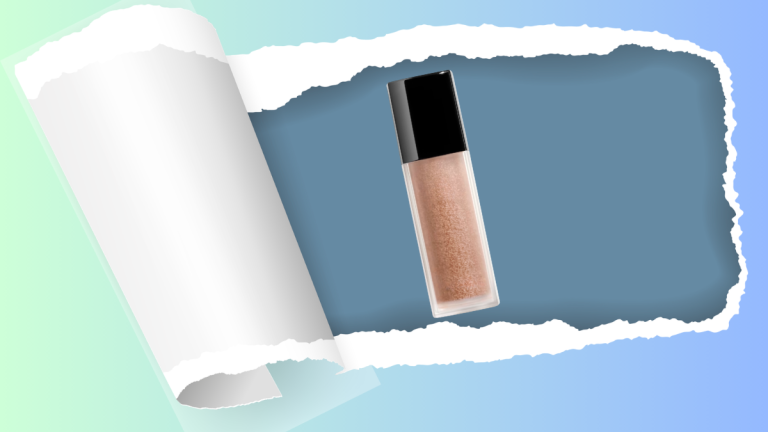
Vintner’s Daughter Active Botanical Serum
This is the face oil that built its reputation around the pressing-in application technique itself, rather than around a single hero ingredient like most luxury serums do. Twenty-two organic botanicals are infused over a three-week process (no fillers, no synthetics), and the brand’s own application method calls for the same slow two-minute press-in technique, which is why this product and the slow-routine evening go hand-in-hand. The 30ml bottle lasts six to eight months for most people at the three-to-five drop dose, and that longevity is the only thing softening the per-bottle price.
The honest caveats start with the $195 price tag, which is the hardest critique to dispute and makes this bottle the splurge anchor of the whole routine by a wide margin. The strong herbal scent isn’t universal either, and a few reviewers find the oil too rich for daytime use even though the brand markets it for both AM and PM, while skin that breaks out easily in the t-zone may want to skip applying it there altogether.
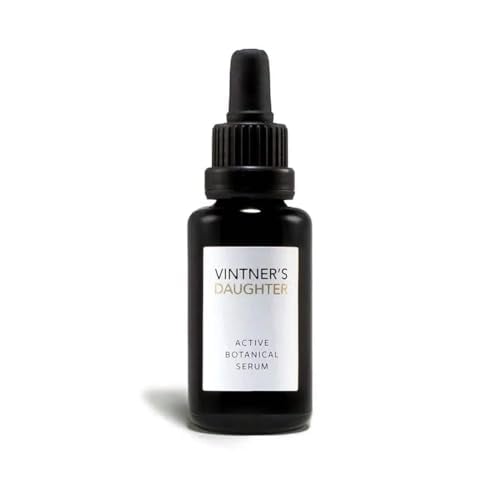
Vintner’s Daughter Active Botanical Serum
The #1 pick for the press-in serum step. A face oil with 22 organic botanicals (no fillers, no synthetics) designed around the pressing-in application technique. The 30ml bottle lasts six to eight months at the three-to-five drop dose.
What Our BEEs Say
BEEs who’ve made the splurge stay loyal, finishing the bottles rather than abandoning them halfway through, which says something at the $195 price point. The cost is also the hardest critique to dispute, and BEEs are clear that this is a once-a-week-facial product rather than a daily moisturizer replacement. The strong herbal scent isn’t universal (some BEEs love it and a few just tolerate it), and a handful find the oil too rich for daytime use even though the brand markets it for both, so most BEEs settle on using it only at night after the mask step, as part of the slow routine.
8. Lock everything in with the last layer
A rich nighttime cream sealed under a thin layer of a balm holds in everything you just spent forty-five minutes putting on. The balm stops moisture from evaporating off the skin overnight, which is the difference between waking up soft and waking up tight.
Anything richer than your usual day moisturizer works for the cream layer. A heavier balm-style formula goes on top of that and sits on the surface, holding the moisture in below it. Use the balm on the cheeks, around the mouth, and the eye area, and skip the t-zone if you tend to break out there (the same balm that locks moisture in will lock oil in too).
(One small thing is worth adding while you’re at it. Dab on a lip balm and a single drop of an eye treatment at the same time you’re applying this final layer. The lips and the eye area are usually the first places to look unrefreshed the next morning if they end up skipped.)
Weleda Skin Food
This is the herbal balm that’s been in production for nearly a century and has stayed in working makeup artists’ kits the entire time, leaning on chamomile, calendula, pansy, and sunflower oil in a texture dense enough to function as the final seal layer of a facial routine. Victoria Beckham, Adele, and Rosie Huntington-Whiteley have all named it on the record over the years, but the more telling endorsement is the rate at which industry artists actually empty and rebuy the small tube.
The honest caveat is the texture and the scope of use. This is a thick, herbal-smelling balm meant for spot use on the dry-prone areas (cheeks, around the mouth, the eye corners, the lips, and cuticles), with a t-zone exception for anyone whose skin already breaks out easily there.
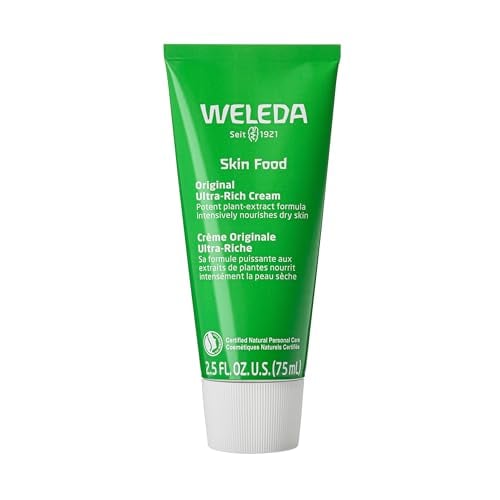
Weleda Skin Food
The #1 pick for the final balm layer. A botanical balm with chamomile, calendula, pansy, and sunflower oil that’s been around for nearly a century and gets repurchased by makeup artists for a reason.
What Our BEEs Say
BEEs use a pea-sized amount warmed between the fingertips, applied to just the dry-prone areas of the face. The texture is the loudest critique, since this is a thick, herbal-smelling balm that wasn’t designed for full-face daily use, and BEEs who try it that way usually back off within a week. Breakout-prone BEEs also report it triggers congestion on the t-zone if used too generously, while the lip-and-cuticle backup use is what keeps the tube in active rotation between facial nights.
Frequently Asked Questions
How often should I do an at-home facial?
Once a week is plenty if your routine includes anything strong like a BHA, retinoid, or vitamin C serum, and every other week is closer to right if you have reactive skin or you’re already using retinoids and BHAs on a daily basis. The point of doing the slow version less often (but really doing it) is that the layered products get time to actually sit on skin, which a five-minute rushed version every day can’t really match no matter how good the products are.
Can I do this if my skin is sensitive or reactive?
Yes, with two adjustments. Skip the steam step entirely (or replace it with a warm wrung-out washcloth pressed against the face), and swap the BHA for a gentle lactic acid pad, or skip the acid step altogether the first few times you try this until you know how your skin handles it. The other six steps are safe for sensitive skin if the individual products themselves are gentle.
Do I really need both an oil cleanser and a water cleanser?
For a facial-quality result on any evening with SPF, makeup, or a long day of pollution on the face, yes. The oil dissolves what water cleansers can’t grip, and the second cleanse then takes off the oil. On a regular weeknight with bare skin and no SPF in play, a single gentle cleanser is fine, which is why the double cleanse really earns its place on facial nights and any night you’ve worn full makeup rather than as a daily commitment.
What’s the difference between this and a regular nighttime routine?
Time and layering, mostly. A regular nighttime routine is two minutes from cleanse to moisturizer, while the at-home facial stretches to forty-five or seventy minutes with built-in waiting between each layer. That extra time is what lets the active ingredients actually penetrate properly instead of skidding off the surface, and the gua sha massage shows up as less puffiness the next morning in a way the rushed version never does.
Is a facial steamer worth buying?
Only if you’re doing the facial weekly and you actually like the steam step on its own, since a pot of just-boiled water and a towel does the same thing for free. The countertop steamers are nicer in some ways (more comfortable, better directed steam, no spilling risk) but the result on your skin at the end is the same either way.
Should I do this before or after a workout?
After. A workout flushes skin and warms the surface, which is exactly when stronger ingredients are most likely to sting going on, so give it at least thirty minutes between the gym and the facial. The shower in between is the right move, and it doubles as the prep step for the routine itself.
What Our BEEs Are Buzzing About
Here’s what the beauty community is saying about these products:
Related Articles
- The Best Moisturizers for Oily Skin From $15 to $70
- Dermatologists Say These 7 Makeup Habits Can Ruin Your Skin
- 13 Costco Beauty Products Worth Buying (and 5 to Skip), According to a Dermatologist
- 15 Drugstore Beauty Products Even Luxury-Beauty Devotees Buy on Repeat
Want to become a Beauty Empties Expert?
BEEs get free products to test, exclusive discount codes from our brand partners, and live access to The Hive sessions with dermatologists and beauty editors. Spots are limited and hand-picked.
We cross-checked every product against PETA’s Beauty Without Bunnies database before publishing. Where you see our cruelty-free mark on a product card, the brand has been independently verified by PETA. Brands without it may still be cruelty-free under their own policies; we only use the mark on the PETA-verified ones.