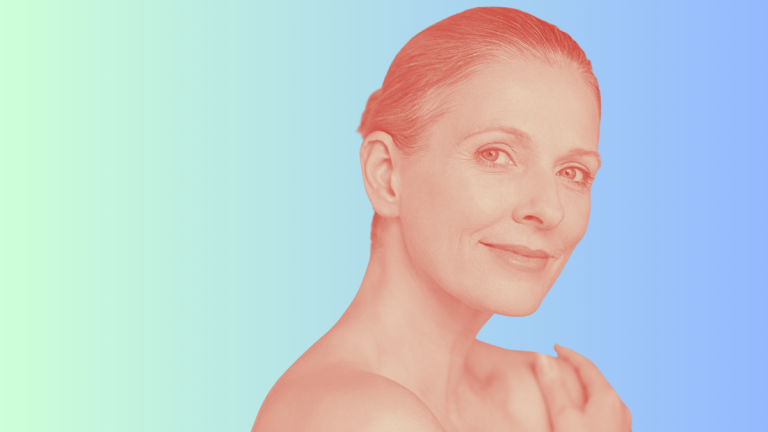
How to Give Yourself a Real At-Home Spa Day (Without Leaving the House or Spending a Fortune)
Every product on Beauty Empties is one that actually gets used up and bought again. Some of the links in this post are affiliate, which means we may earn a small commission if you make a purchase, at no extra cost to you. Thanks for being here!
A real spa day in most cities now costs more than a flight to somewhere with a pool. A facial alone is $150 to $300, a massage tacks on AT LEAST another $150, and the lymphatic drainage thing the algorithm keeps showing you (the one with the visible cheekbone before-and-after) starts at $200. By the time you’re scrolling Mindbody at 11pm doing the “do I deserve this” math, you’ve usually already closed the tab and decided a long shower and your Kiehl’s mask will have to do.
An at-home spa day, the kind that actually leaves your skin softer and your shoulders three inches lower, doesn’t require any of it. It needs a few things you probably already own, six or seven products that are mostly under $15, two or three hours where your phone lives in another room, and an order of operations that turns the whole thing into one continuous experience instead of a stack of skincare steps. The order is the part most at-home spa guides skip. It’s the difference between feeling like you went somewhere and feeling like you just used some products.
The Buzz
The relaxation you feel in a hot bath isn’t just psychological. Soaking in warm water above 92°F triggers your parasympathetic nervous system, which slows your heart rate and drops cortisol. A shower can’t do the same thing because it’s missing three things: water pressure on your veins, sustained full-body warmth instead of a one-sided spray, and lying down rather than standing the whole time.
Set the Room First (This Is the Part People Skip)
An at-home spa day falls flat when the lighting is overhead, the phone is buzzing on the counter, and there’s a pile of laundry visible from the bathtub. The room has to do some of the work, or no $13 clay mask is going to convince your nervous system you’re at the Four Seasons.
A few things that make a real difference:
- Lighting: turn the overhead off. Light two or three candles, or plug in a salt lamp if you have one. If you don’t have either, drag a lamp from another room.
- Sound: pick a playlist before you start so you’re not picking music in a robe with wet hair. “Spa” on Spotify or Apple Music has dozens of pre-made options. Sigur Rós and ambient piano are also good options.
- Temperature: turn the a/c down (or heat up) and run the shower on hot for two minutes before you start, so the room is warm when you undress.
- Phone: Keep it in another room or flipped over on the counter. If you need a timer, use a kitchen timer or your watch. The phone is the single biggest reason at-home spa days don’t work.
- Robe and slippers: Have them ready and warm before you start. If you have a robe, throw it in the dryer for five minutes before you get in the bath.
How Much Time This Really Takes
The minimum is about 90 minutes. The realistic version is closer to two and a half hours. If you give yourself three, you’ll actually feel like you went somewhere.
The full process is outlined below. However here’s how much time each section roughly takes:
- Setup, 10-15 min: Set up the lighting and music, run the bath, throw the robe in the dryer.
- In the bath, 25-30 min: Soak in Epsom salts for at least 20 minutes. Do the body scrub during the soak or as you climb out. Apply the hair mask just before you exit.
- Out of the bath, about an hour: Do the facial steam (5-10 min), the clay mask (15 min), the gua sha (5-10 min), and the sheet mask stacked with the scalp massager (20 min). The hair mask keeps conditioning your hair the whole time.
- Wrap-up, 5 min: Rinse the hair mask out, dry off, and put your robe on.
Step One: A Real Bath, Not a Hot Shower
The hot showers most of us take to decompress aren’t actually decompressing us. A real bath, where you’re horizontal in water above 92°F for at least 20 minutes, is what triggers the relaxation response your nervous system needs to drop cortisol and slow your heart rate. That’s the foundational step that makes everything after it work better.
Run the water hot but not scalding, around 100 to 105°F. Add two cups of Dr Teal’s Epsom Salt Soaking Solution. Researchers are split on whether the magnesium actually absorbs through skin in meaningful amounts, and most clinical studies show modest results at best. But the warm soak itself does the relaxation work, and the salt makes the water feel softer on your skin. Eucalyptus, lavender, and chamomile are the variants worth picking. The pure unscented version is fine for sensitive skin.
If you don’t have a tub, swap this step for a foot soak. Use a large basin or stockpot, fill it with comfortably hot water, add half a cup of Epsom salts, and soak your feet for at least 20 minutes. Warm water on the feet triggers the same parasympathetic response as a full bath, even though you’re only soaking from the ankles down. Everything else in the article works the same way. You’ll do the sheet mask, gua sha, and scalp massage with your feet in the basin instead of after a bath.
Where it falls short: it doesn’t do anything dramatic for muscle soreness if you’re expecting post-marathon-level recovery. The “detox” claims printed on the packaging aren’t supported by clinical research. If you’re buying it because you read it pulls toxins out of your skin, that’s marketing copy, not science.
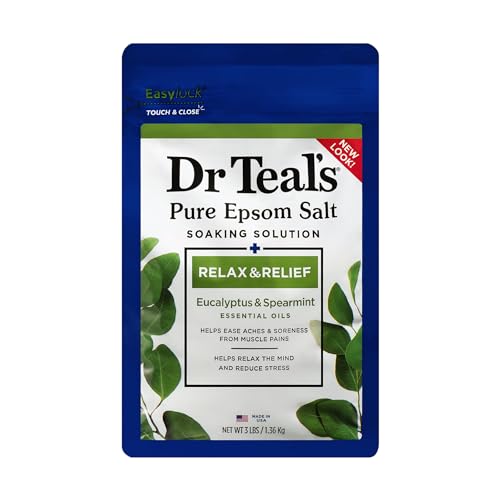
Dr Teal’s Pure Epsom Salt Soaking Solution (Eucalyptus & Spearmint)
The #1 pick for the bath itself. A drugstore staple that runs about $5-$7 per bag, with the most-repurchased reputation in the soak category. Two cups in a hot bath, 20 minutes minimum, lights low.
Step Two: Scrub While You’re Already Wet
Skip the dry brushing for this one. The easier at-home version is a wet sugar scrub applied while you’re in the bath or right after you get out, and the Tree Hut Shea Sugar Scrubs are one of the most-emptied body scrubs on Amazon. They exfoliate without stripping (the shea butter does the conditioning work), and at $8 a tub they cost a third of what most spa scrubs do.
Take a small handful and work it in circles up your legs, around your hips, and across your stomach. Skip your face, since sugar crystals are too rough for facial skin. Rinse off in the bath water or under the shower. The difference is immediate. Skin that was dull and dry comes out looking polished.
The fragrance is heavy and not for everyone. Some of the variants (Coco Colada, Tahitian Vanilla Bean) lean tropical and sweet, and if you don’t like sweet body fragrances this won’t be your scrub. The Original Coconut Lime is the most universally tolerated. Reviewers with very sensitive skin also report the sugar feels too abrasive, and for that group a salt scrub or a finer-grain sugar like Sol de Janeiro Bum Bum Cream is gentler.
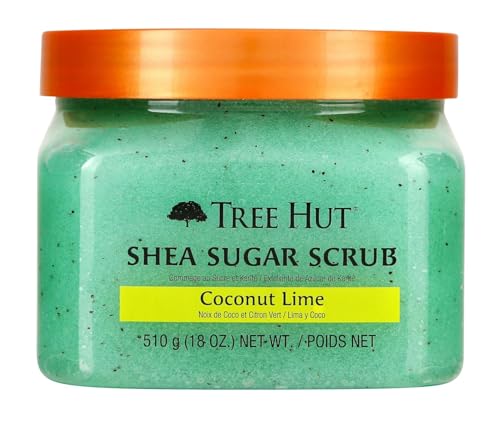
Tree Hut Shea Sugar Scrub (Coconut Lime)
The #1 pick for body exfoliation under $10. Sugar crystals do the polishing, shea butter does the conditioning, and the formula is the most-repurchased in its price tier on Amazon. One tub lasts roughly two months at weekly use.
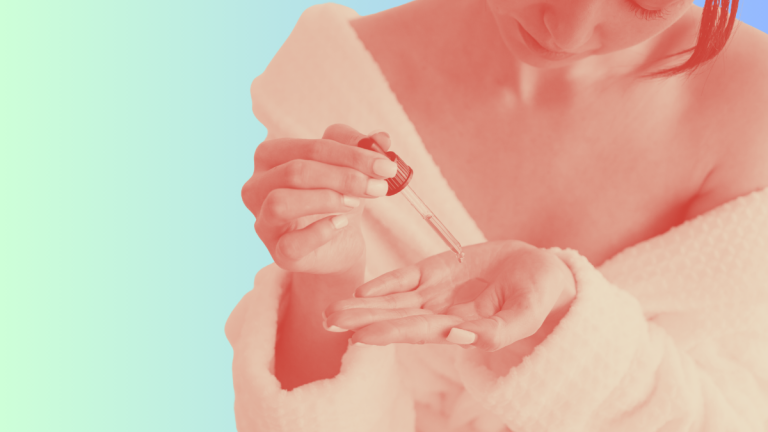
Step Three: Hair Mask Goes On Before You Get Out
Apply a hair mask before you leave the bath, twist your hair up in a clip, and let it sit while you do the rest of your skincare. It will deep-condition for 20 to 30 minutes while you do other things. That’s the order trick that makes at-home spa days feel like one experience instead of a stack of separate steps.
Olaplex’s Rich Hydration Mask is the salon-quality option that beauty editors and stylists name most often. It uses Olaplex’s patented bond-building chemistry (the same technology behind their salon treatments) to repair damage from heat, color, and chemical processing, with a heavy dose of slip and shine ingredients that smooth the cuticle and soften the hair. A pea-sized amount is enough for medium-length hair.
Apply it mid-length to ends, not to your scalp. Comb it through with a wide-tooth comb or your fingers, twist hair into a low bun or wrap in a microfiber towel, then rinse before you get out of the bath.
The price-per-ounce is high (the tub runs about $30). If you have very fine hair, this can weigh it down, and Olaplex’s No. 3 Hair Perfector is a better fit for fine textures. The scent is also polarizing, so if you’ve smelled it in a sample and didn’t love it, don’t buy the full size.
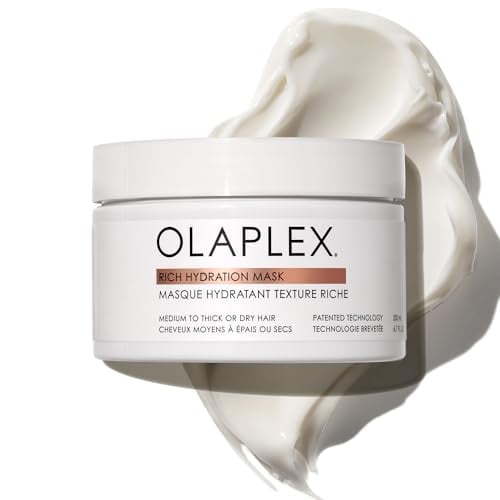
Olaplex Rich Hydration Mask
The #1 pick for the deep-conditioning step. A salon-quality mask that repairs bonds, smooths the cuticle, and adds shine in one 20-minute application. The most-repurchased Olaplex hair mask across beauty editor lists.
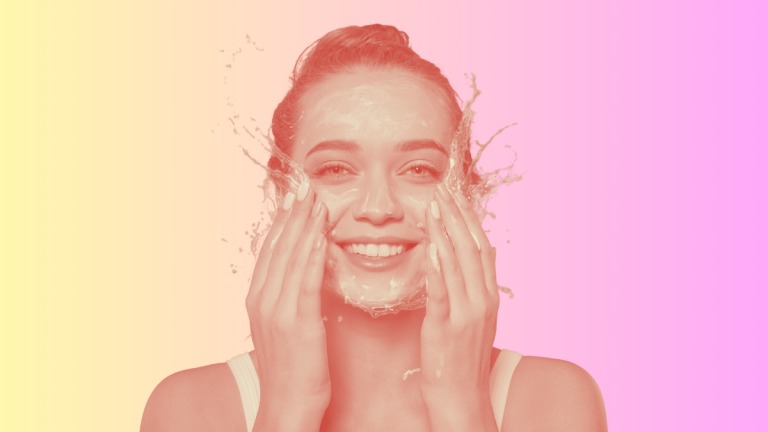
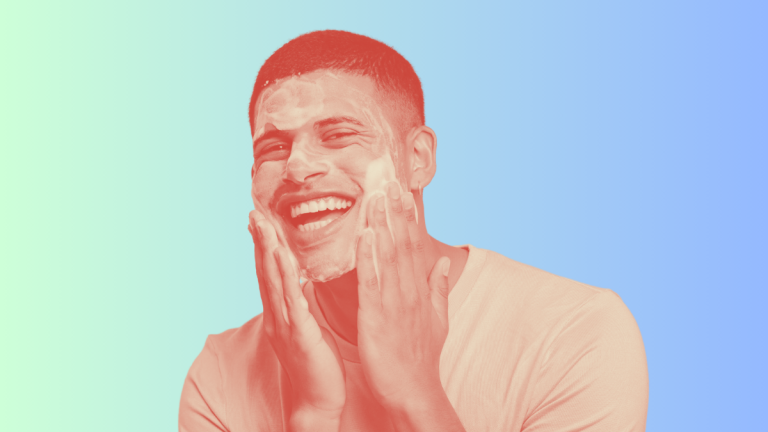
Step Four: A Five-Minute Facial Steam (No Steamer Required)
You don’t need a $50 steamer for this. A pot of water on the stove, brought to a low simmer and poured into a heat-safe bowl, with your face held about 10 inches above and a clean towel draped over your head, is exactly what spas do with fancier equipment. Steam for five to seven minutes, no longer. You’ll know you’ve gone too far if your skin starts to feel hot or tight.
Add a tablespoon of dried chamomile, a few drops of eucalyptus oil, or even a cooled green tea bag for something that feels less utilitarian. The steam itself is the working ingredient: it loosens debris in your pores, increases circulation in the skin, and primes your face for the clay mask coming next.
If you want to upgrade later, the Vanity Planet Aira Ionic Facial Steamer runs about $40 and gives you a finer, more consistent mist. But the kitchen-pot version genuinely works for free, and the experience is identical once your face is under the towel.
Step Five: The Clay Mask That Actually Pulls
Aztec Secret Indian Healing Clay has been one of the most-emptied skincare products on Amazon since the early 2010s, with tens of thousands of reviews and a cult reputation across beauty communities. It’s pure bentonite clay (one ingredient, $13 a pound), and when mixed with apple cider vinegar instead of water, it pulls oil and gunk out of pores in a way that’s visible. The pulsing sensation it creates as it dries is the texture pulling at your skin.
Mix one tablespoon of clay with one tablespoon of apple cider vinegar in a non-metal bowl (metal reacts with the clay and reduces its potency). Stir to a yogurt consistency, apply a thin even layer to your whole face avoiding the under-eye area, and let it sit for 10 to 15 minutes until it’s mostly dry. Rinse with warm water. Your skin will look red for 15 to 20 minutes after, and that’s normal: it means circulation has increased, not that you’ve damaged anything.
The catch is that it’s strong. If you have very sensitive skin, rosacea, or active acne breakouts, the vinegar mix can be irritating. Mix with water instead the first few times to test how your skin reacts. Don’t use it more than once a week. Reviewers with dry skin also find the clay drying, so apply a heavier moisturizer than usual after.
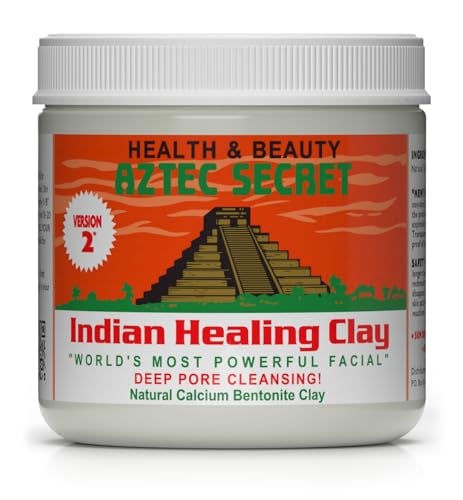
Aztec Secret Indian Healing Clay (1 lb tub)
The #1 pick for the deep-pore clay step. Pure bentonite clay, mix with apple cider vinegar for the strongest pull. One tub lasts months and runs about $13. The most-reviewed clay mask on Amazon by a wide margin.
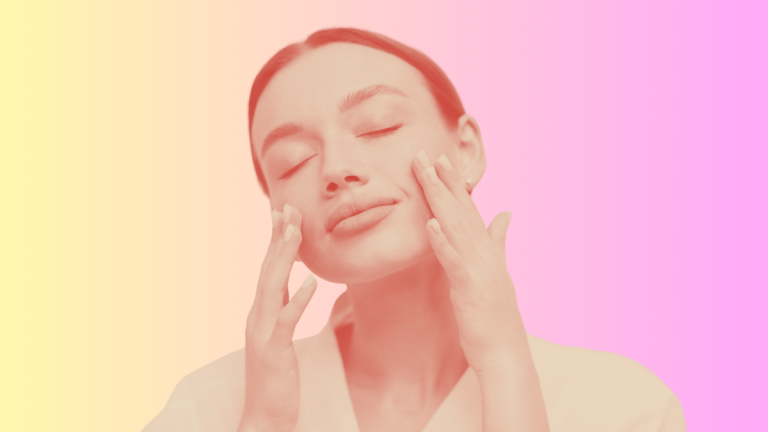
Step Six: Five Minutes of Gua Sha Instead of a $150 Massage
Gua sha (a traditional Chinese medicine practice that Western beauty editors have spent the last five years adopting) is the at-home version of the lymphatic drainage facial massage estheticians charge well over $100 for. The Mount Lai jade gua sha tool, founded by Stephanie Zheng (who built the brand around the practices her family used at home), is the entry-level standard and sits in beauty editor drawers across major publications.
Apply a face oil or serum first. Gua sha needs slip to work. Without it, dragging the stone across dry skin will give you redness without results. Hold the curved edge against your skin at a 15-degree angle. Move from the center of your face outward and upward in slow strokes: jaw to ear, cheek to temple, brow to hairline. Five minutes is enough. Most of the lymphatic action happens at the neck, so don’t skip it (downward strokes only on the neck, toward your collarbone).
The visible payoff is real. You’ll see more definition in your cheekbones and jawline within minutes, and under-eye puffiness drops. The catch is that it works by moving fluid temporarily. The structure of your face isn’t changing. The depuff lasts about 24 hours, and like a workout for your face, you have to keep doing it for the effect to stick.
Where it disappoints: it doesn’t sculpt your face the way TikTok claims it does. Long-term gua sha can support skin tone and circulation, but it isn’t building cheekbones from nothing. If a creator is showing you before/after photos with dramatically different bone structure in 30 seconds, that’s lighting and angle, not the stone.
Mount Lai De-Puffing Jade Gua Sha
The #1 pick for at-home lymphatic drainage. The entry-level gua sha that beauty editors and estheticians point to most often. Five minutes a session, depuff that lasts 24 hours, and the cheapest cosmetic-result-per-dollar tool in the lineup at about $28.
Step Seven: The Scalp Massage You’ve Been Skipping
Your scalp holds the tension your shoulders, jaw, and forehead can’t, and most people never touch it. A scalp massager (the silicone-bristle kind that sells for under $10 on Amazon) does in two minutes what an expensive head spa does in 20. The Heeta Scalp Massager Brush has been an Amazon best-seller for years, with high ratings across hair types.
Use it dry on a clean scalp, or wet with conditioner in the shower. Move in small slow circles from your hairline back to the nape of your neck. Pay extra attention to the spot at the base of your skull where most tension lives. Five to ten minutes is enough. The relaxation hits almost immediately, and the increased circulation can support hair growth over time (the studies are mixed but trending positive).
It’s plastic and silicone, not a luxury object. The handle is bulky and the design is basic. If you want beautiful tools to display, this isn’t aesthetic. But functionally, it’s one of the highest-value-for-dollar items on this entire list.
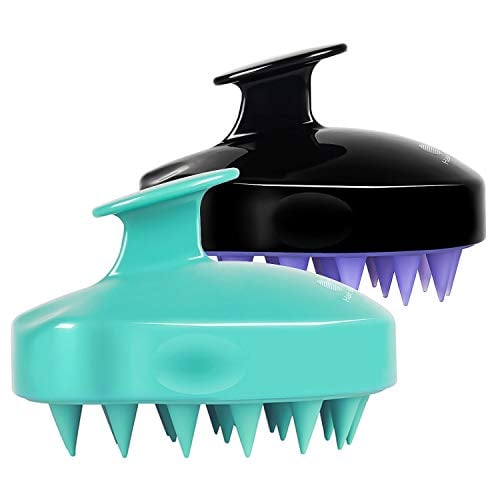
Heeta Scalp Massager Shampoo Brush
The #1 pick under $10 on this list. A silicone-bristle scalp tool that has been an Amazon best-seller for years. Two minutes of use lowers shoulder and jaw tension along with scalp tightness. The cheapest item in the whole spa-day kit.
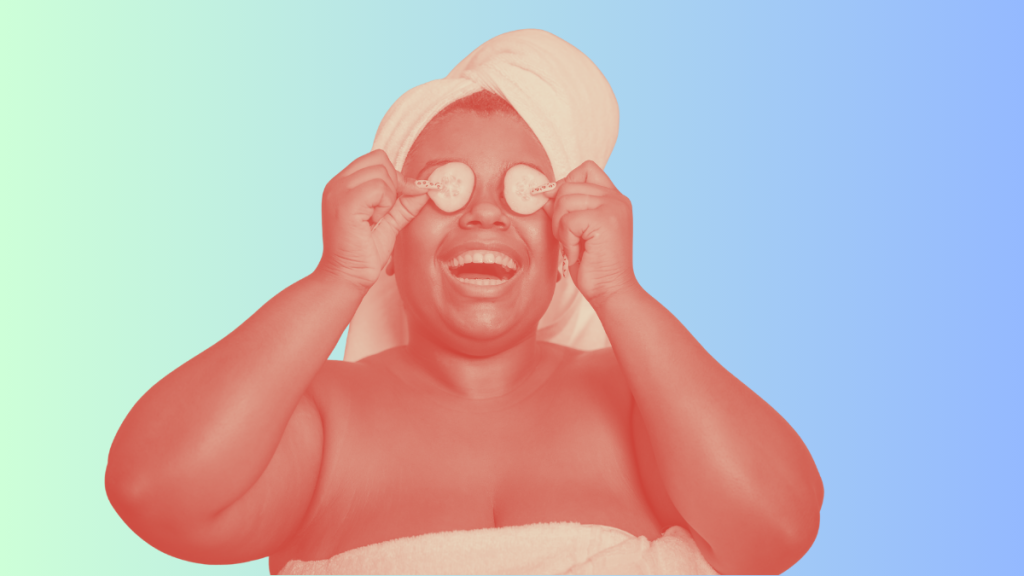
Step Eight: A Sheet Mask While You Lie Flat
The last 20 minutes of an at-home spa day should be horizontal, with a sheet mask on, in low light. A sheet mask is the cheapest way to deliver a serum’s worth of hydration to your face, and the act of lying still while it works is half the point. Tony Moly, Mediheal, and Innisfree run $2 to $4 each at most drugstores and online. Buy them in 10-packs so they’re always on hand.
While the mask sits, use the scalp massager. Lie down, close your eyes, and let both work at the same time. When the mask comes off, pat the leftover serum into your skin and your neck instead of rinsing. That’s where the per-mask cost goes from “expensive single-use” to “actually worth it.”
Frequently Asked Questions
How often should I do an at-home spa day?
Once a week is the sweet spot for most people, and twice a month works fine if your week is too packed for weekly. Daily would be too much. Clay masks, exfoliants, and gua sha all need recovery time, and your skin will get irritated if you stack actives too close together.
Can I do this in less than 90 minutes?
Yes, but you’ll cut the parts that matter most. The bath is what triggers the relaxation response, and the hair mask needs sit time to work. If you only have 45 minutes, do the clay mask and gua sha as a “mini facial” instead. That gets you the visible skin payoff without the full reset.
What’s the one thing I shouldn’t skip?
The phone-in-another-room rule. Every other step on this list works fine without you doing it perfectly, but a phone buzzing through your spa day cancels out the cortisol drop the rest of the setup is built around. If you only follow one rule, follow that one.
Do I really need a gua sha tool, or can I use my hands?
Your hands work for general facial massage, but they don’t do what gua sha does. The flat edge of the stone is what creates the suction that moves lymphatic fluid, and your fingers can’t replicate that pressure or angle. If you’re going to commit to one new tool, the gua sha is the one with the most visible payoff.
Is a bath better in the morning or at night?
Night, by a wide margin. Hot baths cause your core body temperature to drop in the 30 to 90 minutes after you get out, which is a known sleep trigger. Doing your spa day about two hours before bed gives you the best sleep of the week as a bonus.
What if I don’t have a bathtub?
A foot soak captures most of the bath’s relaxation effect without the tub. Fill a large basin or stockpot with bath-temperature water (around 100 to 105°F), add half a cup of Epsom salts, and submerge your feet for at least 20 minutes. Warm water on your feet triggers the same parasympathetic response as a full bath. Your heart rate slows the same way it would in a tub, even though you’re only soaking from the ankles down. Do the sheet mask, gua sha, and scalp massage while you’re soaking. A long, hot, lights-off shower is a secondary option if a foot soak isn’t possible, but the relaxation won’t land the same way.
What Our BEEs Are Buzzing About
The at-home spa day genre is one of TikTok’s most-viewed self-care formats, with creators across skin types and budgets sharing their personal versions. These are seven recent BEE-favorite walkthroughs to bookmark for your next session.
Related Articles
- 5 Body Scrubs You Can Actually Feel Working
- 7 Body Washes That Made Showering the Best Part of the Day
- 6 Hair Masks That Are Worth Every Minute You Sit There Waiting
- The Face Masks That Justify 20 Minutes of Your Time
- This Korean Sheet Mask Has 35,000+ Reviews. Here’s Why People Keep Buying It
The Last Drop
A real at-home spa day costs about $80 if you’re starting from scratch and roughly $20 if you already own most of the basics. It takes about two and a half hours including setup. The skin payoff is real (hydrated, polished, depuffed for at least 24 hours) and the nervous system payoff is bigger. A long bath plus phone-free time will reset a stressed week in a way no five-minute “self-care” routine ever will.
The expensive part of going to an actual spa is the labor and the location. You can replicate both at home if you set the room well, follow the order, and protect the time. The products are the smallest part of the equation. What actually matters is the decision to unplug for two and a half hours, which is the part most of us treat as optional and shouldn’t.